Removing your monitor from the stock stand is one of the smartest upgrades for any home office setup. I used to think monitor arms were just fancy accessories, but they genuinely improve comfort and workspace efficiency.
This guide covers what remote workers, students, and content creators need to know about choosing the right monitor arm. You’ll learn compatibility requirements, mounting options, and mistakes to avoid.
Quick Takeaways:
- Monitor arms reduce neck discomfort by up to 65%
- Check VESA compatibility (75×75 mm or 100×100 mm) before buying
- Clamp mounts suit most desks; grommets work better for heavy displays
- Gas springs adjust smoothly; mechanical springs last longer
- Ultrawides (34″+) need heavy-duty arms rated for 30+ lbs
Why Use a Monitor Arm?
Monitor arms, fix poor posture, clear clutter, and improve inflexible positioning all at once.
Ergonomic Benefits
Research has found that adjustable monitor arms increase productivity by 10%-15%.
Poor monitor placement forces awkward head and neck postures, significantly elevating the risk of musculoskeletal disorders (MSDs), according to OSHA ergonomic guidelines.
Optimal positioning—at eye level and arm’s length away—promotes neutral alignment to help prevent neck/shoulder strain.
When you can’t adjust your monitor, you adapt your body instead, which leads to hunching, craning, and tilting.
This is why arms make such a difference: they allow you to position screens at eye level to maintain neutral spinal alignment.
Standing desk users see a 45% increase in productivity when pairing their desk with an adjustable arm, as the screen adapts to both sitting and standing heights.
Space Optimization
Beyond the ergonomic advantages, the physical footprint of stock monitor stands creates another problem.
These stands require substantial desk space, with V-shaped bases that prevent keyboards from being placed underneath.
By removing that stand, you instantly free that surface, allowing you to slide documents under the screen or position your keyboard closer.
This space-saving effect is even more pronounced in multi-monitor setups. Two arms need one mounting point instead of two 18-inch stands, for the eating desk depth.
Workflow Efficiency
The ability to reposition your screen in seconds fundamentally changes how you work. Creators pull monitors closer for detail work, students rotate screens to share notes, and designers switch from landscape to portrait without tools.
Quick scenarios:
- Solo work to screen sharing
- Video editing to general productivity
- Sitting-to-standing transitions
Core Compatibility Requirements
Before buying, ensure that three critical elements align: VESA holes, weight capacity, and desk support.
VESA Mount Standards
Your first compatibility check is VESA mounting, which defines standardized hole patterns on monitor backs.
Most displays use VESA MIS-D with either 75×75 mm or 100×100 mm spacing (measures the distance between four mounting holes in a square).
Monitors 12-23 inches typically use 75x75mm, while screens 24+ inches use 100x100mm.
Fortunately, most arms support both patterns. Larger displays between 23 and 31 inches sometimes require VESA MIS-E (100×200 mm or 200×200 mm).
The notable exception involves non-VESA monitors, such as some Apple displays, which require adapter brackets that create artificial mounting points.
Monitor Size and Weight
When shopping, you’ll see capacity ranges such as 4.4-26 pounds listed in arm specifications. To prevent sagging and ensure longevity, keep your monitor at 60-70% of its maximum capacity for stable operation, as running at 100% causes sagging and premature wear.
Wide screens challenge standard capacity assumptions. A 34-inch model weighs 15-18 pounds, while a 49-inch model weighs 28-31 pounds.
These require heavy-duty arms rated for 30-42 pounds, as the width creates leverage stress on the pivots beyond weight alone.
Desk Type and Mounting Options
Monitor arms come in four mounting styles, each suited to different desk scenarios: clamp, grommet, wall, and freestanding.
The most common option, clamps, attach to desk edges with C-brackets. While clamps grip the edges, grommets are bolted through desktop holes for a more permanent installation.
Wall mounts bypass the desk entirely by anchoring directly to studs, while freestanding bases sit on surfaces, making them ideal for glass desks or temporary setups.
Before choosing clamps, verify that your desk has flat, square edges with a 25-35mm accessible lip; bevelled or rounded edges prevent secure clamping and require grommet installation instead.
For maximum stability, grommets outperform clamps for flush mounting, distributing weight more evenly. They require 10-35mm diameter holes, which you can create using existing cable grommets or drill new ones.
Mounting Challenges
Glass desks require special mounting considerations due to the material’s fragility. Never use clamps on tempered glass since the concentrated pressure can shatter it instantly. Grommet mounting needs rubber washers and metal backing plates on both surfaces.
Beyond glass, particleboard and hollow-core desks present their own challenges with weight distribution.
Desks under 20mm thickness lack the structural integrity to safely support arms, flexing under pressure and creating instability regardless of mount type.
| Mount Type | Desk Requirement | Stability Notes |
| Clamp | Flat edge, 10-50mm thick | Easy install, repositionable |
| Grommet | 10-35mm hole needed | Maximum stability, permanent |
| Wall | Stud mounting required | Frees desk, fixed position |
| Freestanding | Stable surface | Works with glass, limited height |
Types of Monitor Arms
Single Monitor Arms
If you have a standard 17-32-inch monitor weighing 4.4-26 pounds, single-arm mounts offer the ideal solution with maximum adjustability, as each joint supports a single screen, giving you complete positioning flexibility.
Prices range from $30 to $300+, with the sweet spot being mid-range $60-100 options that work well for standard 24-27-inch monitors under 15 pounds.
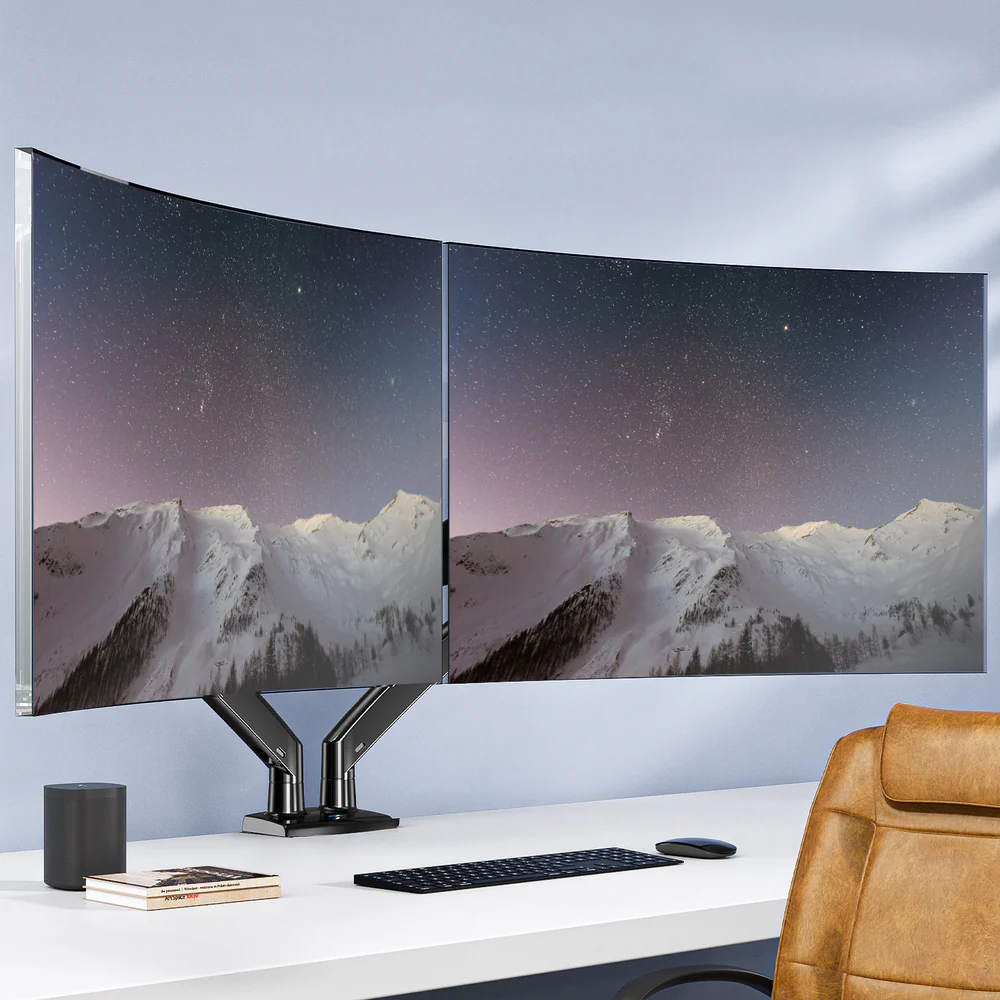
Dual Monitor Arms Desk Mount
Dual-arm mounts two screens to a single base, either side by side or stacked. They save space and cost less than two singles, but they sacrifice flexibility because screens share adjustment points.
Side-by-side configurations suit matched monitors, though desks against walls may lack clearance to centre both screens.
Stacked arrangements work well for video editing or trading, but weight distribution matters since heavy monitors shouldn’t sit on top.
Multi-Monitor & Specialty Arms
Triple setups need either three singles or dedicated mounts. Three singles offer flexibility but consume desk edge, while dedicated mounts consolidate to one base but lock configurations.
Ultrawide arms represent a specialized category designed to handle 34-49 inch displays. Heavy-duty models support 30-44 pounds and feature reinforced tilt mechanisms, as standard arms fail with ultrawides due to the extra width, which creates excessive leverage that overwhelms standard mounting hardware.
| Type | Typical Use | Weight Range | Best Audience |
| Single | Solo display | 4.4-26 lbs | Remote workers, students |
| Dual Side | Productivity | 8-34 lbs total | Office workers, developers |
| Dual Stack | Creation | 8-34 lbs total | Editors, traders |
| Triple | Multi-task | 13-52 lbs total | Designers, analysts |
| Ultrawide | Wide screens | 30-44 lbs | Gamers, creators |
Key Technical Features to Evaluate
Adjustment Range and Articulation
Four movements define arm capability: height (vertical), tilt (up/down), swivel (left/right), and pivot (landscape/portrait). Premium arms offer full articulation in all dimensions.
Height typically ranges from 10-15 inches, while reach ranges from 12-24 inches. More reach requires rear-desk clearance, as the arms swing back when extended.
A tilt of ±20° handles most needs; a swivel requires at least 180°; and portrait mode requires a 90° pivot in both directions.
Weight Capacity and Sag Prevention
Two spring types dominate the market. Gas springs use pressurized nitrogen for smooth adjustment that allows one-finger repositioning, though gas degrades over 5-10 years.
Mechanical springs use coiled metal that needs more adjustment force but lasts forever without tension loss. Budget arms use mechanical mechanisms, while premium options favor gas.
Tension adjustment becomes critical when you add, remove, or swap monitors with different weights. External knobs beat internal screws for accessibility.
Cable Management Features
Cable routing progresses through three tiers of quality. Bare arms offer plastic clips; better models provide integrated channels; and the best designs route cables through the mounting pole, keeping everything hidden.
Leave slack if you adjust frequently. Sit-stand users need extra length for full height range without cable tension.
Must-Have:
- VESA 75×75 and 100×100
- Weight capacity 20%+ above the monitor
- 10+ inch height adjustment
- ±15° tilt minimum
Nice-to-Have:
- Gas spring mechanism
- Integrated cable channels
- Quick-release VESA
- Clamp AND grommet included
Installation and Setup
Pre-Installation Steps
Start by measuring the desk thickness, as most arms handle 10-50mm. Verify your model’s specs match.
Locate the VESA holes on the back of the monitor and check the spacing pattern with a ruler to confirm 75mm or 100mm. Remove the stock stand.
Clamp vs Grommet Setup
Clamps take 10 minutes to install. Position it against the desk edge, slide the clamp under, and tighten without over-tightening, which could crush the particleboard.
Grommets need drilling if no existing holes are available. Use a 10-12mm bit matching the bolt diameter and drill slowly to avoid exit splintering. Feed the bolt from below, then secure with a nut and washer.
Post-Install Adjustment Tips
Attach the monitor and test the hold position. If the screen sinks, increase tension. If it springs upward, decrease tension. Gas arms have hex bolts on cylinder sides, while mechanical arms use joint screws.
Level by eye and tilt the top back 10-15° to reduce glare. Route cables last, leaving 6-8 inches slack at the monitor. Test full motion to confirm cables don’t pull tight.
Steps:
- Measure desk thickness
- Remove the stand and identify VESA
- Mount base (clamp/grommet)
- Attach arm to base
- Connect VESA plate to the monitor.
- Attach the monitor and adjust the tension.
- Test motion, fine-tune
- Route cables with slack
Ergonomics Best Practices
Optimal Monitor Height
Position the top screen edge aligned with eye level when sitting straight. Colebrook Bosson Saunders notes that improper adjustability forces body adaptation through hunching and neck strain, while eyes rest at 15° downward naturally.
Bifocal wearers may need lower positioning to avoid head tilting for reading portions.
Viewing Distance
Sit an arm’s length away, which translates to 20-30 inches for standard monitors. Larger displays need proportional increases: 32-inch monitors sit 28-32 inches away, while 27-inch screens work best at 24-27 inches.
If you find yourself leaning forward to read, move closer or increase the OS font size.
Multi-Display Layouts
Angle dual monitors slightly inward, creating a gentle curve that reduces eye movement and equalizes viewing distance. Position the primary monitor in the center with the secondary on your dominant-eye side.
Configurations:
- Side-by-side: Productivity, email + documents
- Stacked: Coding, video timeline work
- Primary center + secondary angled: General office
- Three-wide: Trading, design with multiple windows
Choosing Based on Use Case
Remote Workers
Prioritize adjustment range and sit-stand compatibility since you’ll reposition multiple times daily, shifting between calls, focused work, and browsing. Gas springs make this effortless.
Look for 12+ inches of height adjustment and 18+ inches of reach to accommodate sitting and standing without maxing out the range. Integrated channels prevent cable snags during transitions.
Budget $80-150 for 5-10 year quality, which breaks down to $8-30 annually for ergonomic benefits.
Students
Working with 21-24-inch monitors means budget solutions in the $40-70 range become viable without sacrificing stability. Mechanical springs offer durable construction with indefinite tension retention.
Clamps are suitable for frequent moves between dorms or apartments because they leave no permanent holes.
Match VESA and weight to the current monitor, with upgrade headroom, but skip premium features such as USB hubs or RGB.
Content Creators
Ultrawide or multiple high-res displays require heavy-duty arms with substantial capacity and rock-solid stability, as wobbles during precise work are unacceptable.
Ultrawides between 34-49 inches require a minimum rating of 30-44 pounds, with gas springs handling weight better at scale. Reinforced tilt joints prevent sagging under the load from wide screens.
Multiple inputs and outputs create cable chaos, making generous routing or clips essential for organization.
Features by Audience:
- Remote Workers: Gas spring, 12+ inch height, sit-stand compatible, cable channels
- Students: Mechanical spring, clamp portability, VESA 75/100, 15-20 lb capacity
- Content Creators: Heavy-duty gas, 30-44 lb ultrawide capacity, reinforced tilt, premium cables, quick-release VESA
Common Mistakes to Avoid
Over-Specifying Weight Capacity
A 42-pound arm holding a 12-pound monitor creates balancing issues because the arm’s spring tension pushes up against the monitor’s weight, which pulls down. Too-light monitors float upward and feel twitchy; match capacity to actual needs.
Ignoring Desk Support Limits
Particleboard under 20mm flexes under clamp pressure, creating wobble regardless of arm quality.
The desk becomes the problem, not the mount. Reinforce with backing plates, switch to grommets with large washers, or accept that the arms won’t work.
Not Leaving Cable Slack
Zero slack means adjustments, yank ports, damaging connectors, and limiting range.
Always leave 6-8 inches of extra space at the monitor; sit-stand users should add 12-18 inches for the height range.
Quick Decision Guide
- Single vs Dual: One monitor → Single arm | Two same-size → Dual arm | Two different → Two singles
- Clamp vs Grommet: Rental → Clamp | Permanent → Grommet | Glass → Grommet only | Beveled edge → Grommet
- Weight Class: Under 15 lbs → Standard (4.4-26 lb) | 15-25 lbs → Mid-range (20-30 lb) | Over 25 lbs → Heavy-duty (30-44 lb) | Ultrawide 34″+ → Heavy-duty with reinforced tilt
- VESA Check: 75×75 mm or 100×100 mm → Standard | 200×100 mm or 200×200 mm → Large VESA | No holes → Need adapter
Glossary of Terms
- VESA: Standardized mounting hole patterns (75×75 mm, 100×100 mm)
- Gas spring: Pressurized nitrogen cylinder for effortless adjustment
- Mechanical spring: Coiled metal spring providing counterbalance
- Tension adjustment: Dial/screw adjusting spring force to match weight
- Tilt: Up/down angle adjustment
- Swivel: Left/right rotation
- Pivot: 90° landscape/portrait rotation
- Ergonomic height: Top edge aligns with eye level
- Clamp mount: C-bracket attaching to desk edge
- Grommet mount: Bolt-through installation via desktop hole
Summary
Monitor arms cut neck strain by 65%, clear desk clutter, and enable effortless positioning. Ergonomic benefits compound since proper screen placement prevents long-term musculoskeletal problems.
Check compatibility before buying. Verify VESA holes (75x75mm or 100x100mm), confirm monitor weight at 60-70% of arm capacity, and ensure desk supports mounting. Clamps work for standard desks, while grommets provide superior stability for heavy displays.
Singles maximize flexibility for one screen. Duals save space and money for matched monitors. Ultrawides need heavy-duty 30-44 pound models with reinforced tilts. Gas springs adjust smoothly but cost more, while mechanical springs last longer at budget prices.
Mount securely, adjust tension matching monitor weight, and position top edge at eye level. Leave cable slack for full motion. Follow best practices with arm’s length distance and inward angle for dual screens.
FAQ
What is the difference between clamp and grommet monitor arms?
Clamps attach to desk edges with C-brackets tightening underneath. No modifications needed, making them ideal for rentals. Installation takes 10 minutes and requires flat edges with 25-35mm accessible space.
Grommets bolt through desktop holes for permanent but extremely stable installation. Use existing cable holes or drill new ones (10-12mm diameter). Base sits flush providing cleaner looks and better stability.
For maximum stability with ultrawides, choose grommet. For flexibility, choose clamp.
Can I use a monitor arm with an ultrawide monitor?
Yes, but you need heavy-duty arms rated specifically for ultrawides. Standard arms supporting 4.4-26 pounds prove insufficient for most ultrawides since 34-inch models weigh 15-18 pounds and 49-inch versions hit 28-31 pounds.
Look for 30-44 pound ratings because ultrawide width creates significant leverage on mounting hardware. Standard tilts sag even at correct weights, requiring reinforced tilting mechanisms for wide displays.
Ergotron HX, Mount-It Heavy Duty, and VIVO ultrawide models handle screens to 49 inches and 44 pounds. Expect $100-200 versus $50-80 for standard options.
How do I adjust the tension on a gas spring arm?
Most gas arms have hex bolts accessible from cylinder sides or bottoms requiring a 4-5mm hex key. Some place bolts at base where arm connects to pole.
To increase tension when monitor sags, turn clockwise in quarter turns. Test by positioning and releasing to confirm it holds without drifting.
To decrease tension when monitor springs upward, turn counterclockwise in small increments since over-loosening causes sudden drops.
Premium arms include weight indicators showing correct tension visually. Adjusting takes 2-3 minutes and requires the monitor attached since you can’t set tension without actual weight.
Will a monitor arm fit a thick desk?
It depends on thickness and mounting method. Standard clamps accommodate 10-50mm (0.4-2 inches), while heavy-duty clamps extend to 65-80mm. Measure before buying rather than guessing.
Grommets handle thicker desks better since drilling bolt through means thickness matters less if bolt is long enough. Most grommet installs work to 60mm, though extremely thick desks (60mm+) might need longer bolts from hardware stores.
The bigger problem involves what’s underneath. Executive desks, credenzas, and standing desks have supports, drawers, and cable trays below where clamps go. Obstructions prevent clamps physically fitting even at correct thickness. Grommets bypass this by going through desktop but need underside clearance for backing plate and nut.
For desks over 60mm thick or with underside obstructions, consider wall mounting or freestanding bases.
Are dual monitor arms better than two single arms?
Each option has advantages. Duals cost less at $80-150 versus $100-200 for two singles while using less desk edge space with both monitors on one base. Simpler installation makes them attractive. For matched same-size monitors in standard side-by-side configurations, duals work great.
Two singles offer superior flexibility by positioning each independently without constraints from shared base. Different sizes or unconventional layouts (one center, one angled side) handle easily. Adding or removing one doesn’t affect the other. Desks against walls benefit since you’re not fighting fixed crossbar geometry.
Stability difference remains minimal with quality arms since well-made duals don’t wobble more than two singles. However, two singles distribute weight across two points helping with non-sturdy desks.
Choose duals for matched monitors, standard layouts, and budget setups. Choose two singles for maximum positioning freedom, mismatched monitors, and unusual configurations.